

In this article, I would be setting up a Node project with Postgres database and Knex query builder.
What is Knex
Knex.js is a “batteries included” SQL query builder for Postgres, MSSQL, MySQL, MariaDB, SQLite3, Oracle, and Amazon Redshift designed to be flexible, portable, and fun to use.
To get started, we have to initialize our project to create our package.json file.
1npm init -y
Database Setup
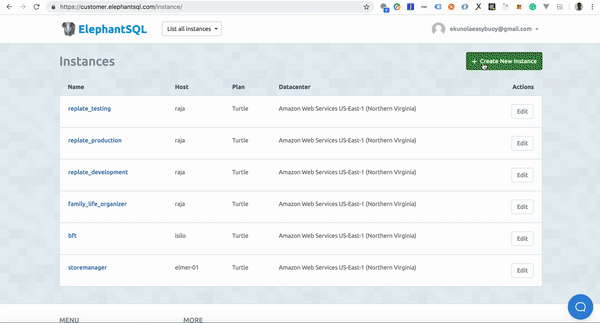
I would be using an online database called Elephantsql to set up my database. You can register here.
After registering, create a database. An example is shown below.
Setup Knex
Install dependencies needed for the project
1npm i knex -g2npm i pg express dotenv --save
Create a .env file in the root of your project and add the database URL. Example below.
1DB_URL=URL (where URL is the database connection string)
On your the terminal, run the command below to initialize knex
1knex init
The above command would generate a knexfile.js in the root of your project and would look like below.
1// Update with your config settings.23module.exports = {45 development: {6 client: 'sqlite3',7 connection: {8 filename: './dev.sqlite3'9 }10 },1112 staging: {13 client: 'postgresql',14 connection: {15 database: 'my_db',16 user: 'username',17 password: 'password'18 },19 pool: {20 min: 2,21 max: 1022 },23 migrations: {24 tableName: 'knex_migrations'25 }26 },2728 production: {29 client: 'postgresql',30 connection: {31 database: 'my_db',32 user: 'username',33 password: 'password'34 },35 pool: {36 min: 2,37 max: 1038 },39 migrations: {40 tableName: 'knex_migrations'41 }42 }4344};
I am going to change the knexfile.js configuration file to use Postgres and also specify the directory where my migrations and seeds should be saved. Edit the knexfile.js file to the code below.
1require('dotenv').config();23module.exports = {4 development: {5 client: 'pg',6 connection: process.env.DB_URL,7 migrations: {8 directory: './data/migrations',9 },10 seeds: { directory: './data/seeds' },11 },1213 testing: {14 client: 'pg',15 connection: process.env.DB_URL,16 migrations: {17 directory: './data/migrations',18 },19 seeds: { directory: './data/seeds' },20 },2122 production: {23 client: 'pg',24 connection: process.env.DB_URL,25 migrations: {26 directory: './data/migrations',27 },28 seeds: { directory: './data/seeds' },29 },30};
DB Config
Create a db.js file in the data directory that would hold our knex configuration in the data directory. This would hold the configuration for our environments.
Add the code below to the db.js file.
1const knex = require('knex');23const knexfile = require('../knexfile');456const env = process.env.NODE_ENV || 'development';7const configOptions = knexfile[env];89module.exports = knex(configOptions);
Migrations
Migrations allow for you to define sets of schema changes so upgrading a database is a breeze.
To create/generate a migration file, run the command below.
1knex migrate:make todo
Note: todo in the command above is the migration name.
The above command would create a migration file in the path specified for migrations. In our case /data/migrations
We can then edit the migration file to include the columns we would be needing in our todo table.
1exports.up = knex =>2 knex.schema.createTable("todo", tbl => {3 tbl.increments();4 tbl.text("task", 128).notNullable();5 });67exports.down = knex => knex.schema.dropTableIfExists("todo");
To run the migrations, you can run the command below
1knex migrate:latest
Note: knex migrate:latest would run through all our migration files and run the up functions which would then create the tables in our database.
To rollback the migrations, you can run the command below
1knex migrate:rollback
Note: knex migrate:rollback would run through all our migration files and run the down functions which would then drop the tables in our database.
Seeds
Seed files allow you to populate your database with test or seed data independent of your migration files.
To generate seeds, run the command below on your terminal
1knex seed:make todo
This would create a todo.js file in your seeds directory. specified for seeds in our knexfile.js, which can then be edited to include our test data.
Example of a seed file below.
1exports.seed = function(knex) {2 // Deletes ALL existing entries3 return knex('todo').del()4 .then(function () {5 // Inserts seed entries6 return knex('todo').insert([7 {id: 1, task: 'Create API'},8 {id: 2, task: 'Watch Money Heist'},9 {id: 3, task: 'Do Dishex'}10 ]);11 });12};
To run the seeds files we can run the command below on your terminal
1knex seed:run
The run command then gets all seeds files and then seeds them to our database.
Scripts
You can add scripts to package.json file.
1"scripts": {2 "start": "node index",3 "migrate": "knex migrate:latest",4 "unmigrate": "knex migrate:rollback",5 "seed": "knex seed:run "6 }
start: This command is to start our application.
migrate: This command is to add our migrations to our database.
unmigrate: This command is to rollback/remove all existing migrations from the database.
In order to query the database, all you need to do is to import in the db.js file we created and make the query. An example is shown below.
1const db = require("./data/db.js"); // importing the db config23app.get("/todo", async (req, res) => {4 const todos = await db("todo"); // making a query to get all todos5 res.json({ todos });6});
Conclusion
In this article, we have been able to look at setting up a Node API with a Postgres database and Knex query builder.
The source code used in demonstrating can be found here.
Find more information on knex here
If you have any questions or feedback, please feel free to reach out on Twitter.
Thanks for reading.

