I will be doing a walk-through process of deploying a React app from Github to Netlify.
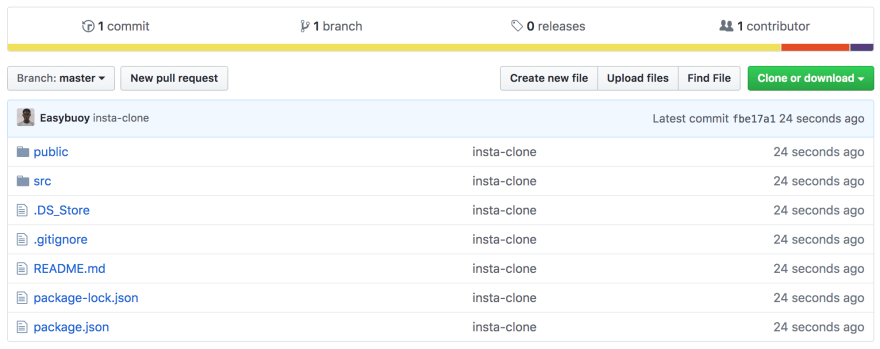
If you have a project structure where the react app is NOT nested in a sub-directory like in the example shown below

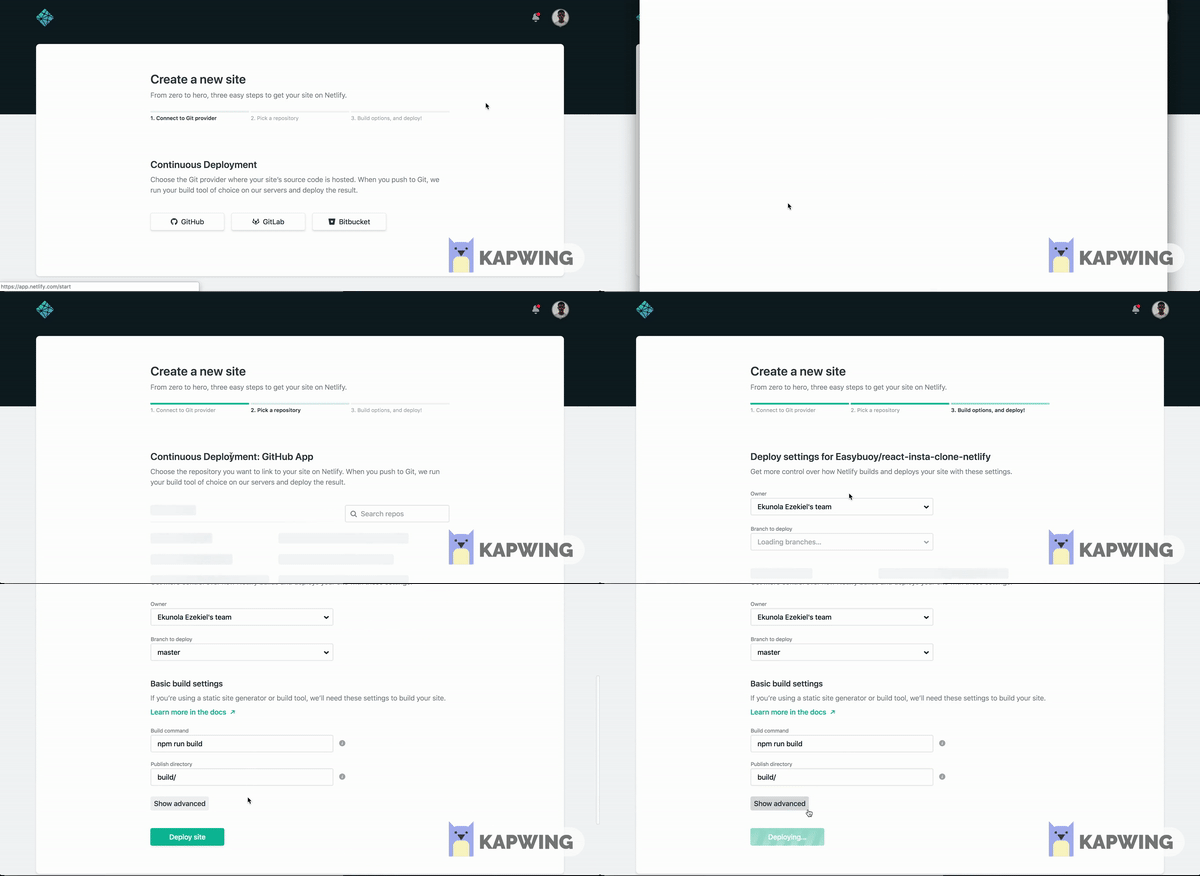
You can use the following steps to deploy:
- Push your code to Github
- Connect Github account to your Netlify account
- Select the project to deploy
- Deploy project

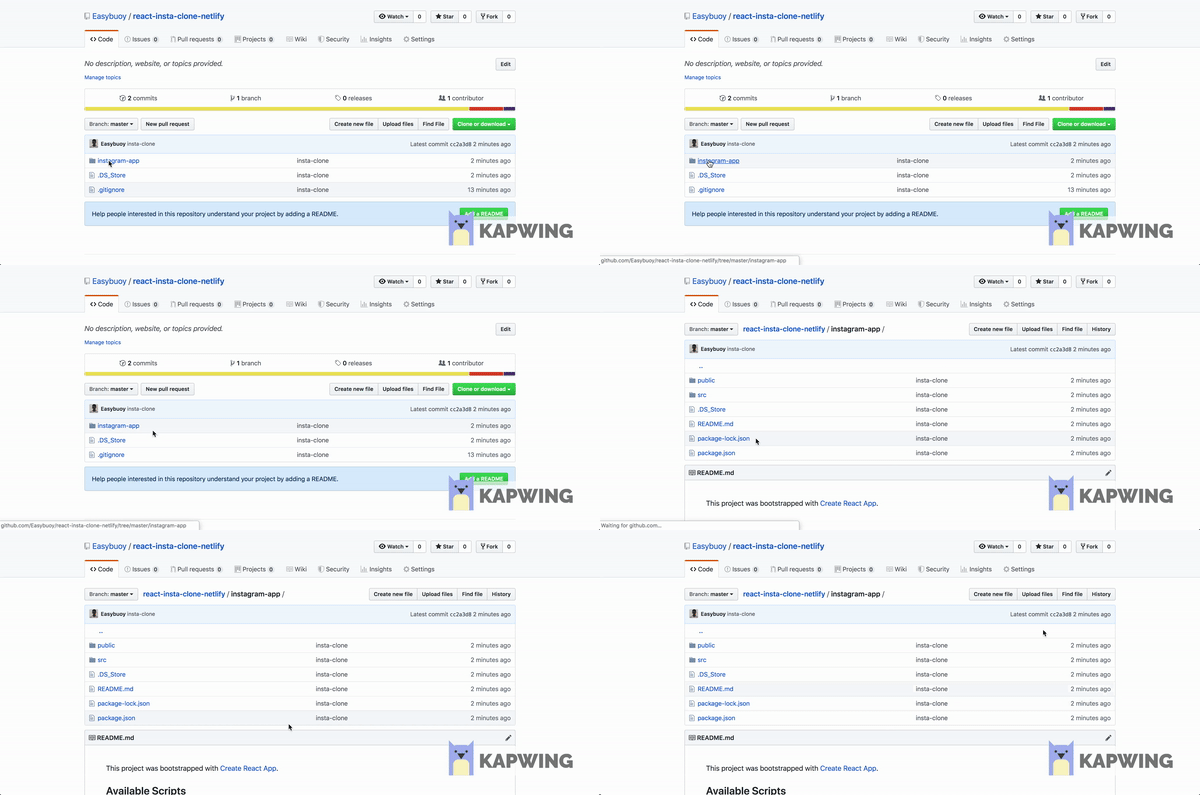
In cases where the react app is in a nested directory like the example shown below

Add a netlify.toml file to the root of your project, and add the configuration below to the file.
1[build]2 command = "npm run build"3 publish="path-to-react-app/build"4 base = "path-to-react-app"
React Router
If you’ve made use of react-router in your project, on redirecting and reloading to a new route, you may run into issue where Netlify would throw an error (“page not found”) as shown in the example beloww

You can add the following code to your netlify.toml file.
1[[redirects]]2 from = "/*"3 to = "/index.html"4 status = 200
Once added, push the changes to Github. Netlify should automatically deploy the changes, if not, deploy the changes manually. Once deployed, your application should not throw errors, as shown below.

Note: netlify.toml is a configuration file where you can specify how Netlify should build/run your application. A lot can be accomplished with the netlify.toml file. Find out more about the netlify.toml file here.
Environment Variables
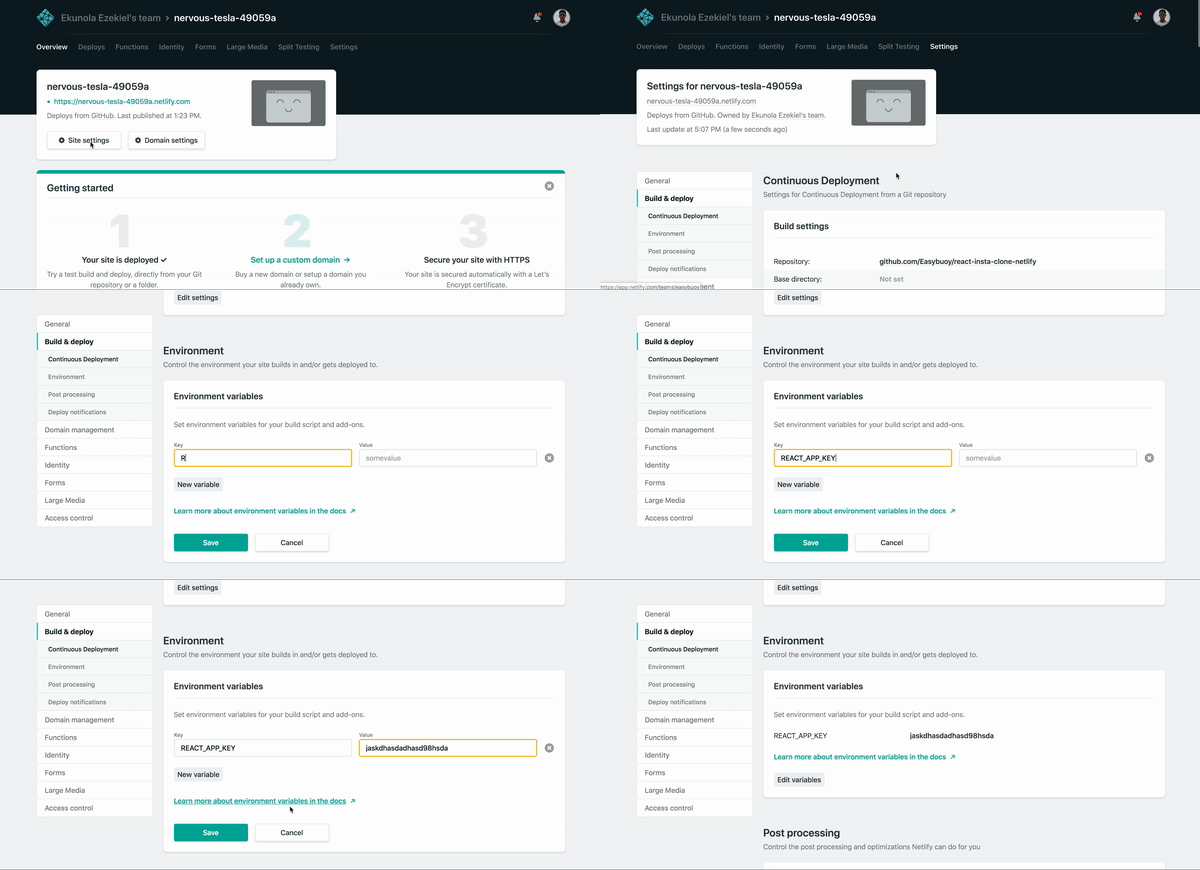
If you’ve made use of environment variables in your project, you can also add them to Netlify by following the steps shown in the image below

Conclusion
From the foregoing, we have seen and been able to demonstrate that hosting a react application through Github on Netlify is pretty simple and seamless, hence can be done in little or no time.
If you have any questions or feedback, please feel free to reach out on Twitter.
Thanks for reading.